Posted on

How to Finish Your Beadwork

Finishing Beadwork Edge

A Step-by-Step Guide to Perfecting Your Beaded Keychain Edges

Beadwork has been a deeply cherished art form among Indigenous peoples for centuries, and as a Métis artist, I carry on this tradition with great pride and respect for my heritage. Whether you’re just starting or already have some experience with beadwork, finishing your piece properly is just as important as creating it. In this post, I’ll walk you through the process of finishing the edge of a beaded keychain and share a video demonstrating the techniques that will elevate your beadwork to the next level.

The Importance of Finishing Your Beadwork

Properly finishing your beadwork is essential for durability and aesthetic appeal. When beads are stitched together, the edges can be raw or uneven. If left untrimmed or unfinished, the piece may unravel or lose its shape. But with the right technique, you can ensure that your work looks polished, professional, and built to last. This is especially crucial for wearable pieces like keychains, which see daily use and need extra strength to endure the wear and tear of daily life.

Materials You’ll Need and Where to buy them

Before you dive into the finishing process, gather the following tools:

  1. Needle – A fine beading needle to work through the beads easily.
  2. Thread – Use a strong beading thread such as Nymo D or Fireline. You’ll need it to secure the edges.
  3. Scissors – For trimming excess thread and trimming your Pellon.
  4. Needle nose pliers (optional) – Helpful for pulling the needle through tight spaces.
  5. Beads (for edging) – Depending on your design, you may want to add additional beads along the edges.

At the moment I buy my beads online at Beazu and have them shipped to me. Strung Out On Beads in Abbotsford that I’ve been meaning to checkout as they have moved to a new location. I believe you need to prebook a time as it’s out of a residence.

How to Finish the Edge of Your Beaded Keychain

Step 1: Plan Your Edging

First, decide how you want to finish your beadwork. Some options include:

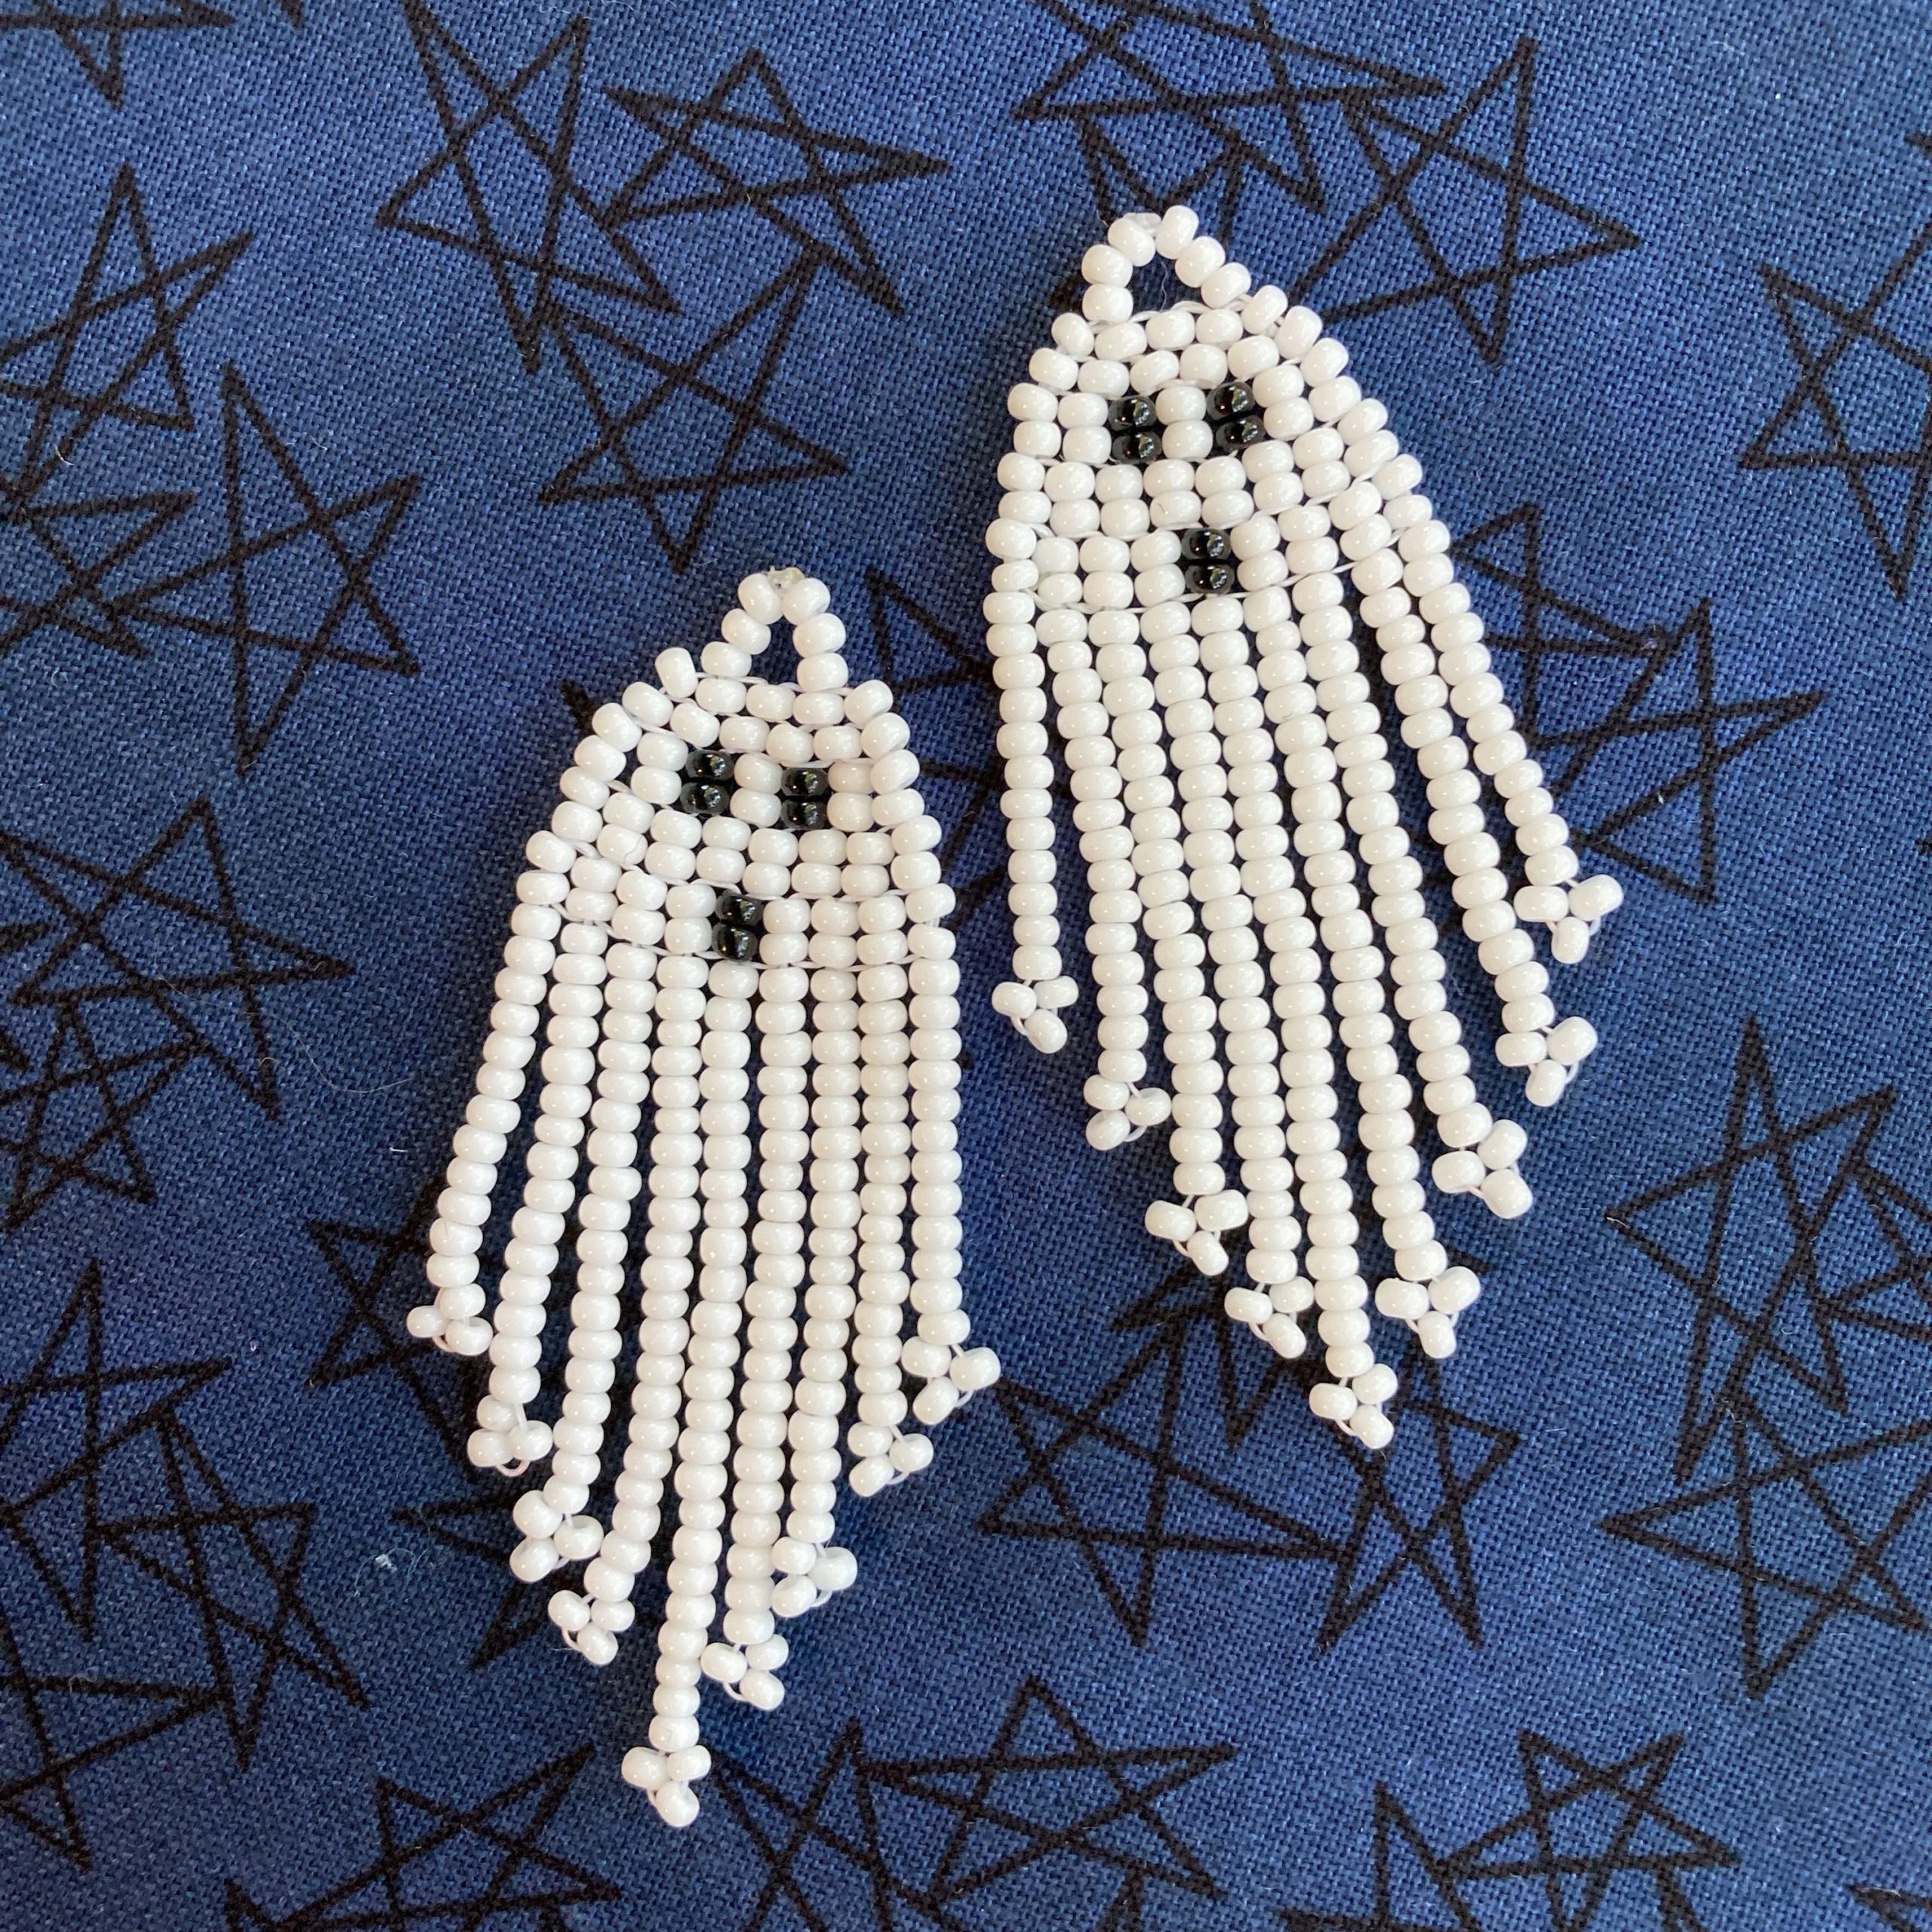
  • Beaded fringe: A simple, elegant way to add texture and movement to your piece.
  • Picot edge: Small, decorative loops at the edges that give a delicate touch.
  • Flat edge: A clean, simple finish using beads that line the edge straight across.

For this tutorial, I will demonstrate the flat edge technique, which is easy to follow and works well for most beadwork pieces, including keychains.

Step 2: Stitch the Final Beads

Now, with your keychain already beaded, it’s time to start finishing the edges. Thread your needle and tie a knot at the end. Begin at one corner or side of the beaded piece, and stitch the first bead into place by going through the last row of beads. This will anchor your thread.

Step 3: Secure the Edge

Work your way along the edge of the beaded keychain, adding beads one at a time. The beads should sit flat against the edge of the piece, aligning neatly with the last row of beads. As you sew through each bead, be sure to pull the thread tightly so that the beads are snug against the edge. This will ensure a clean, tight finish.

Step 4: Weave the Thread

Once you’ve finished stitching along the entire edge, it’s important to weave the tail of the thread back through the beads a few times to hide any loose ends and prevent the thread from unraveling.

Watch the Process in Action!

In the video below, I demonstrate the entire process of finishing the edge of a beaded keychain. Watch closely as I show you how to stitch the beads into place, secure the thread, and add that final touch that will make your beadwork shine!

Final Thoughts

Finishing your beadwork is a vital step in ensuring that your piece is not only beautiful but durable as well. The technique you choose to finish the edges of your beaded keychain can change the entire look of your piece, adding elegance, personality, and strength.

As a Métis artist, I love sharing my passion for beading. I encourage you to experiment with different edging styles and continue to honour the art of beadwork. Whether you’re making keychains, earrings, or any other piece, remember that the journey of creation doesn’t end when you’ve completed your beads—it’s in the finishing touches that your art truly comes to life.

Happy beading!

Posted on

Halloween earrings and more!

ghost earrings

Just in time for Halloween!

Our Halloween earrings are ready to ship and up on our website.

Once orders are placed we do our best to ship them out the next business day.

These spooky fringe earrings are only here for a limited time.

Once November comes they will be gone!

Save the date

Sunday November 13th from 10:00 am – 3:00pm

Join us at the Whonnock Handmade Winter Market.

This is one of two markets we will to do each year.

Posted on

Spring Foraging

open dandelions in grass

Spring and summer are busy foraging months that we look forward to it each year.

Here at Foraged Roots we are both foragers of nature as well as our Métis culture and roots.

What have you been foraging for this year?

Our foraging this spring started when the stinging nettles were popping up.

We picked nettles to eat and hang for tea.

Next up where the dandelions, a Foraged Roots favourite.

We picked and harvested dandelions to make into a tea which we then used to make syrup and jelly.

Dandelion jelly is a gorgeous yellow colour and it tastes just like honey.

We also harvested a few huge roots from our backyard.

Do you have a favourite berry or tree you are excited for each year?

Three of our favourites are:

Salmonberries, Thimbleberries and Norway Spruce tips. More on these three later.

Posted on

Whonnock Handmade Spring Market

Join us on Sunday May 1st for our first market

Spring Market

We are happy to announce that we will be vendors at the Whonnock Handmade Spring Market on Sunday May 1st from 10-4pm

Join us at our first market together as Foraged Roots.

We’ve been beading for months and we can’t wait to show you what we have been up to!

Spring Market
Posted on

Medivnyk – Ukrainian Honey Cake

Honey cake

This delicous cake was not too sweet and perfect to pair with a cup of fireweed tea. It’s a tasty recipe that was made with local honey from our friends at Ruskin Apiaries. I really enjoyed this cake, as it was the first recipe we baked together as Foraged Roots. This recipe comes from Karlynn Johnston the Kitchen Magpie.

Medivnyk – Ukrainian Honey Cake

This delicious cake was not too sweet and perfect to pair with a cup of fireweed tea.

Honey Cake

  • 1/2 cup butter (room temperature)
  • 1 cup brown sugar (packed)
  • 4 eggs
  • 1 cup honey
  • 3 tbsp cornstarch
  • 3 cups all-purpose flour
  • 2 tsp baking powder
  • 1 tsp baking soda
  • 1 tsp cinnamon (ground)
  • 1/2 tsp salt
  • 1/4 tsp cloves (ground)
  • 1/2 cup sour cream
  • 1/2 cup strong black coffee (cooled)

Honey Cream Cheese Glaze

  • 1 pkg cream cheese (softened (8oz))
  • 1/4 cup honey
  • 1/4 cup icing sugar
  • 3 tbsp heavy cream (as needed)
  1. Preheat the oven to 325°F (170°C). Grease a 10-inch (25-cm) Bundt pan with butter or cooking spray.

  2. Place the butter in the bowl of a stand mixer fitted with the paddle attachment. Beat the butter to soften it and then add the brown sugar. Beat them together until light and creamy. Beat in the eggs 1 at a time, until fully incorporated. Add the honey and mix well.

  3. In a medium bowl, whisk together the flour, cornstarch, baking powder, baking soda, cinnamon, salt and cloves until combined.

  4. Combine the sour cream and coffee in a liquid measuring cup.

  5. Beat one-third of the dry ingredients into the butter mixture, followed by one-third of the liquid mixture. Repeat twice, ending with the last of the liquid mixture.

  6. Pour the batter into the prepared Bundt pan. Tap the pan gently on the counter to release any air bubbles and then place it in the oven.

  7. Bake for 55 to 65 minutes, until a cake tester comes out clean. As with all Bundt cakes, check in the middle of the cake and also by the inner tube for doneness.

  8. Let cool in the pan for 10 minutes and then invert onto a wire rack to cool completely. Wrap in plastic wrap to keep moist.

  9. To make the glaze, combine the cream cheese, honey and icing sugar in a medium-sized bowl. Using a hand mixer or stand mixer, beat the mixture until creamy and smooth. Add the cream, 1 tablespoon at a time, until the glaze reaches your desired consistency. Adjust the sweetness by adding more icing sugar if needed and balancing the consistency with a bit more cream.


  10. Pour the glaze over the cake and let set for a few minutes. Slice and serve.


Dessert
Canadian, Ukrainian
cake, Honeycake, Medivnyk
Posted on

Kokum Scarves and Ukraine

Kokum Scarf Pattern (yellow)

Tanshi moon naamii/hello my friends!

Like most of the world, our attention is focused on Ukraine right now. We thought it would be a fitting topic to make our first post about Ukraine, and their ties to Indigenous culture.

In the late 19th century, some of the first Ukrainians began immigrating to Canada. They often faced discrimination from the dominantly Protestant and English-speaking settler community.  They settled in the prairies and soon developed relationships with the local Indigenous and Métis people, as they saw that they shared similar struggles.

Through these friendships, trade started happening. Ukrainians would trade their stitch work for Indigenous beadwork, food  and recipes were exchanged – our community gatherings often still include cabbage rolls and perogies!

 Today, the colourful floral scarves, known as Kokom scarves or Granny hankies (Kokom means Grandmother in the Cree language) are a symbol of hard work, cultural exchanges, and commonalities between the two communities. They are used in powwow dancing, incorporated into jewellery, accessories and garments, and lately they show our solidarity with the people of Ukraine.

In the spirit of bartering with our neighbours, Melani traded her Big Leaf Maple Syrup she tapped this winter, for some honey from her neighbours at Ruskin Apiaries.

We decided to try a Ukrainian-Canadian recipe using the local honey when we came across this recipe for Medivnyk (Ukrainian Honey Cake) from The Prairie Table by Karlynn Johnston.

This was an easy recipe to follow, and the cake was a perfect afternoon refreshment with a cup of fireweed tea. The recipe can be found on our blog.

Ukrainian Honey Cake